
The Brapper (AMORE)
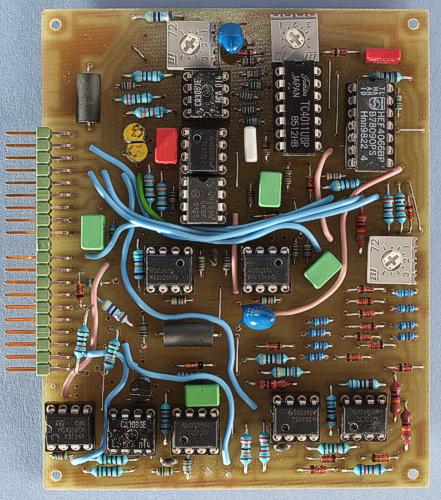
The prototype version of the board. There are a few differences compared to the final board.
This is a combination
module with an AD/AR envelope generator and a wave multiplier of
Jürgen Haible's design. The latter was inspired by the famous
Serge wave multiplier. Together they can produce an effect that
sounds like the attack on trumpets and some other brass instruments.
The name of the module comes from this sound. The two sections can be
used separately for other effects, however. The wave multiplier can
be fed either control voltages or audio waveforms. With the latter,
it alters the sound a bit like a voltage controlled filter. The
difference is that whereas filters remove overtones, the wave
multiplier adds new overtones. For audio, the wave multiplier usually
sounds best when fed triangle waves.
Note that the waveform of the
wave multiplier changes when you add a DC offset to the input signal.
Therefore, a DC offset is available as a separate CV input, according
to the AMORE standard.
The
envelope shaper section is similar to my VCAD
but has been redesigned to offer switchable AD or AR response. It has
voltage control over attack rate and decay or release rate. The
slopes are linear. There is also a parameter for controlling the
height of the envelope. This works differently than on the dual
VCAD, which has a VCA to control the amplitude of the envelope.
Here the height parameter affects the comparator level in the
envelope generator itself. Because the attack and decay/release
parameters are rates, this means that these times will be shorter
when you decrease the height parameter. I added some compensation for
this, but since the rates are exponential and the level is linear,
this only works for levels from around 50 % up to 100% and only
approximately. This circuit is my own design.
Sound samples
The brapper (used as envelope generator, controlling the Minimoog clone filter)
The wave multiplier (processing a triangle wave. LFO on offset CV and manually turning the signal level knob)
Bill of materials
You should have access
to the parts in the general bill of
materials.
In addition, you need the following less common
parts:
There are no special parts needed.
Trimming
There are three trimmers and they all affect the envelope generator:
Delay
This
trimmer adds a fixed delay to the gate signal. The purpose is to
prevent the brap effect from be heard when you stop blowing. You can
set this to taste.
Init D/R
Sets
a fixed decay/release time. If you only use the board for the brap
effect, you can use this trimmer instead of a panel mounted
decay/release potentiometer, because then you don't need to readjust
this parameter when using the synth. If you do have a knob for
decay/release, you can omit this trimmer altogether. If you have
both, be sure to set the trimmer for the shortest decay/release time.
Offset
Set
the attack and decay/release CV knobs plus the init relese trimmer to
max (= fastest attack and decay/release). Trig the EG from an LFO and
check the output on an oscilloscope. Adjust the offset so that the
attack and decay/release just remains at the fastest possible. Be
sure not to turn it any further when you have reached the shortest
time.
Skill level required: MEDIUM
There isn't really anything particularly difficult on this module, but the parts are densely packed and there are a lot of wire connections to route correctly.
Schematics for the AD/AR envelope generator
Schematics for the JH wave multiplier A
|
Connector pin |
signal |
on this module |
|
1 |
1 oct/V |
not used |
|
2 |
in 1 |
trig/gate EG |
|
3 |
CV 1 |
attack CV |
|
4 |
CV 2 |
decay/release CV |
|
5 |
CV 3 |
envelope height CV |
|
6 |
-15 V |
-15 V |
|
7 |
out 1 |
EG output |
|
8 |
-1 V |
-1 V |
|
9 |
gnd |
gnd |
|
10 |
key |
- |
|
11 |
switch 1 |
mute EG |
|
12 |
switch 2 |
AD/AR |
|
13 |
out 2 |
wave multiplier output |
|
14 |
+15 V |
+15 V |
|
15 |
+10 V |
not used |
|
16 |
aux output |
not used |
|
17 |
in 2 |
wave multiplier input |
|
18 |
CV 4 |
multiplier offset CV |
|
19 |
CV 5 |
multiplier input AM CV |
|
20 |
CV 6 |
not used |